
"2024 Approved AceThinker Screen Recorder Review and Alternative"
AceThinker Screen Recorder Review and Alternative
Designing your screen recording goal would make it agreeable to figure out how AceThinker Free Screen Recorder can further develop you to achieve what you want. AceThinker Free Screen Recorder is certainly one of the most mind-blowing free screencasting software conceivable on the lookout in case the client is focused on planning interactivity content or straightforward instructional exercises for online watchers. The desktop version, AceThinker screen grabber pro permits you to screen record the presentation with the framework sound, receiver or even both all the while. Despite being a web-based apparatus, it functions admirably with extra elements to upgrade the recorded video.
AceThinker screen recorder is a comprehensive mixed media Step for desktop-based clients. This is an exhaustive program that capacities as a video converter, video editorial manager, and video downloader. At the point when you think about the most ideal choice for an internet-based recorder, AceThinker Free Online Screen Recorder is the one that comes on the first spot on the list. It is an exceptionally basic device that doesn’t expect you to introduce software or any outsider applications. It is a free online apparatus thus will require a fair web association for its productive working. You can undoubtedly catch and screen record the whole screen of your PC or feature and select the space of show you need to record. It is additionally amazingly lightweight, and it holds up insignificant space to work the application. With no limits, you can screen record limitless recordings with AceThinker.
Part 1. AceThinker Free Online Screen Recorder
Part 2. AceThinker Screen Grabber Pro
Part 3. Alternative Way to Record Computer Screen
Part 1. AceThinker Free Online Screen Recorder
AceThinker Free Screen Recorder is an internet-based interactive media screen recorder for Mac, iPad, Windows, and iPhone clients. The application is lightweight, super-quick, and dependable. You can record the screen with an AceThinker Free Screen Recorder while chipping away at constant drawing media for comment. The multifunctional explanation apparatus permits you to add shapes, pictures, and text to the recordings.
Step 1: Go to AceThinker Webpage
Initially, open your program and go to AceThinker free screen recorder and here you will be approached to download the launcher for first-time use. Click on download launcher and whenever it has been downloaded, introduce the launcher and return to the AceThinker site page.

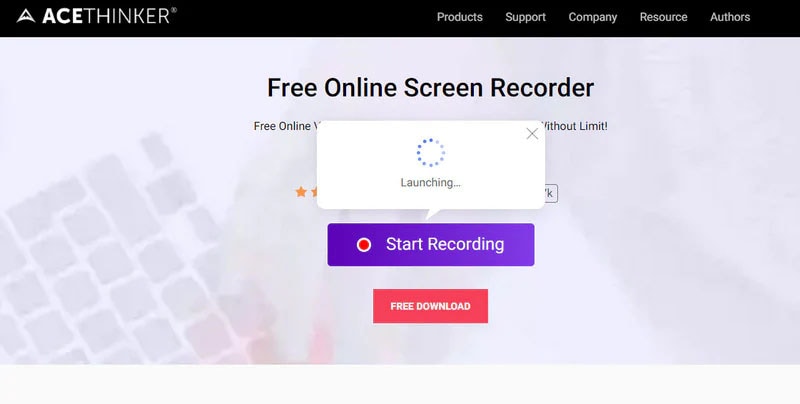
Step 2: Video Settings
Then, at that point, you get to pick the locale of the screen you need to record. You can change the specific settings as indicated by your inclination. Here, you can likewise refresh the sound settings, outline rate, video designs and so forth
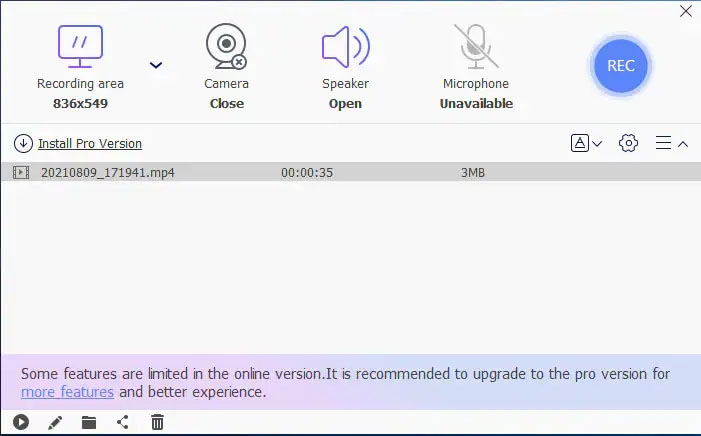
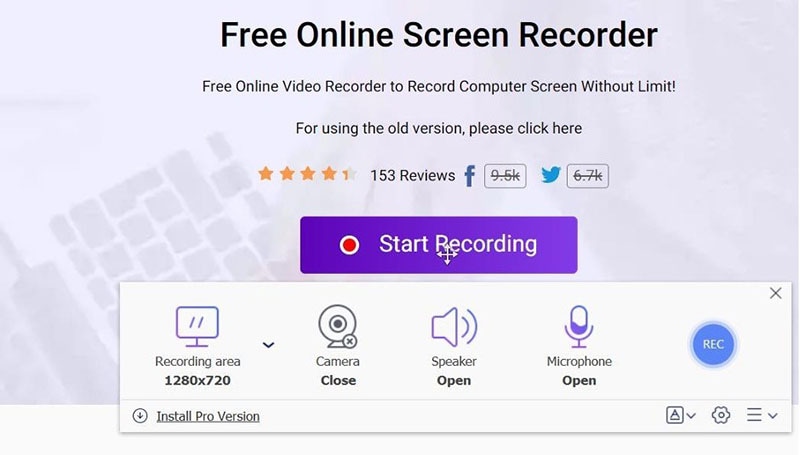Step 3: Initiate/End Recording
When you approve of the settings, click on the red shaded button to start the screen recording. You can likewise stop the video or even erase and afterwards restart the recording assuming you are not fulfilled. Finally, when you are finished with the recording click on the stop button and save the video. You can likewise share this video to your preferred foundation including YouTube, Vimeo, Dropbox and so forth
Part 2. AceThinker Screen Grabber Pro
If, you are somebody in pursuit of a product with further developed elements than any of the free internet-based instruments can offer then you should investigate AceThinker Screen Grabber Premium. AceThinker Screen Grabber Premium has a screen capture catching element and the caught picture can be saved as JPEG, PNG, GIF, and so forth Last yet not least, Screen Grabber upholds different sound and video designs including MP4, AVI, MOV, MP3, M4A, WMA, and some more. This rendition will offer you different choices to satisfy your requests. The spotless interface makes it a successful and easy to use the device for screen recording on your PC permitting you to alter the region you need to catch. On the off chance that you are occupied somewhere else; assist with recording any live video like your talks or any work meeting in progress.
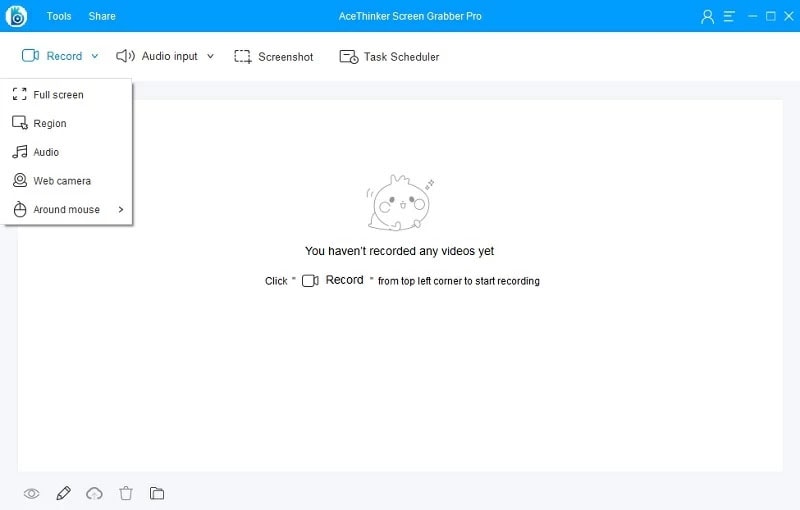
Step 1: Download and Launch the Program
Download the program from the button above and introduce it on your PC. From that point onward, Open the installer and follow the manual to save it on your PC. After the establishment, dispatch it to get to the main interface. You will see the principal interface, as represented underneath.
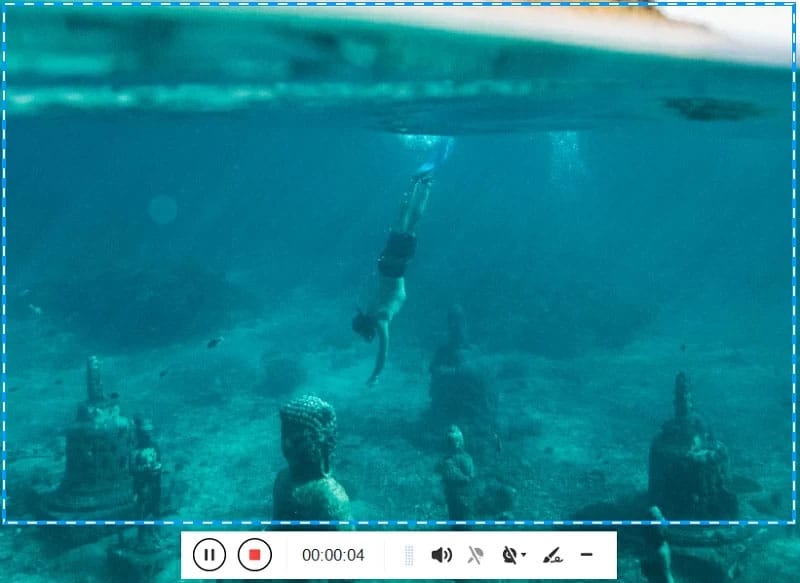
Step 2: Start Recording
Whenever you have affirmed with the catch area, click OK from the toolbar that will seem to instate recording. A three-second commencement will start, and whenever it’s done, the recording will initiate. Then, at that point, you will see an edge around the catch district with a toolbar underneath it. You can handle the recording progress utilizing the choices in this toolbar.
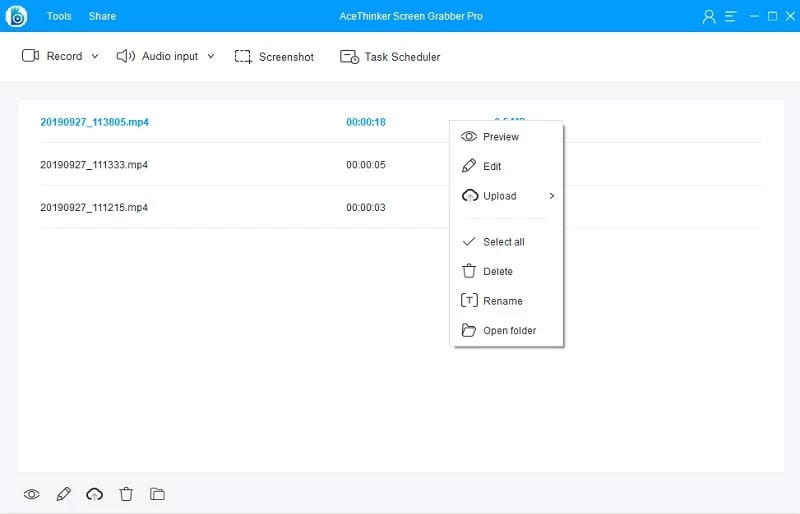
Step 3: Finish and Save the Recording
At the point when you are finished recording and explaining, click the Stop button to complete the screencast. When the recording closes, the recorded video will show up on the see board of the device. Assuming you need to share the recorded video on YouTube or your FTP, you can get to the transfer choice. By tapping the “Transfer” button You can play the video, transfer a new record, find the record, and the sky is the limit from there. In case you have different recordings recorded, you can orchestrate them in a rundown or rename them as indicated by your necessities.

Part 3. Alternative Way to Record Computer Screen
Notwithstanding, AceThinker Screen Grabber probably won’t meet your necessity as a web-based record maker who utilizes thorough expert level altering. This screen recorder, while being liberated from cost and portable, it accompanies specific constraints. There are customizations you can just do in more remarkable screen recording and altering software. The application doesn’t offer much in cutting edge video altering like chroma key, speed sloping, outlines each subsequent change, and so forth. The issue with video editors is their muddled nature that compels you to go through days learning their intricate details. However, at that point, there are different projects like Filmora Screen Recorder that have their attention set on making it as simple as conceivable to alter your clasps. Accessible for Windows just as Mac machines, it is as easy to use as it highlights rich, and can be messed with regardless of whether you have no earlier thought of how to alter recordings.
The straightforwardness of the entire issue is apparent right from the beginning. You can likewise utilize this instrument on low-end workstations and work areas. It is a lightweight load with a simple to utilize interface. Filmora is a video editorial manager application that offers highlights like managing, changes, overlays, and other amazing impacts. A basic yet hearty application can run on Windows and iOS gadgets. The interface of Filmora Video Editor is a humble and natural one. Four fundamental choices welcome you toward the beginning. The initial one is to begin altering a video, while the subsequent one is for opening a new venture. The third one is the activity camera apparatus, while the fourth one is intended for right away slashing your long recordings. There’s likewise a dropdown menu permitting you to choose the perspective proportion you need your altered video to have.
Step 1: Download and Install Wondershare Filmora
You can visit the official website and get the latest version of the Filmora for free. As soon as the download has been completed, you can install the software in minutes. We recommend going for Default installation if you’re a beginner and lacks pro-level know-how. Filmora sorts out the screen recording task as soon as you launch it on your system.
For Win 7 or later (64-bit)
For macOS 10.12 or later
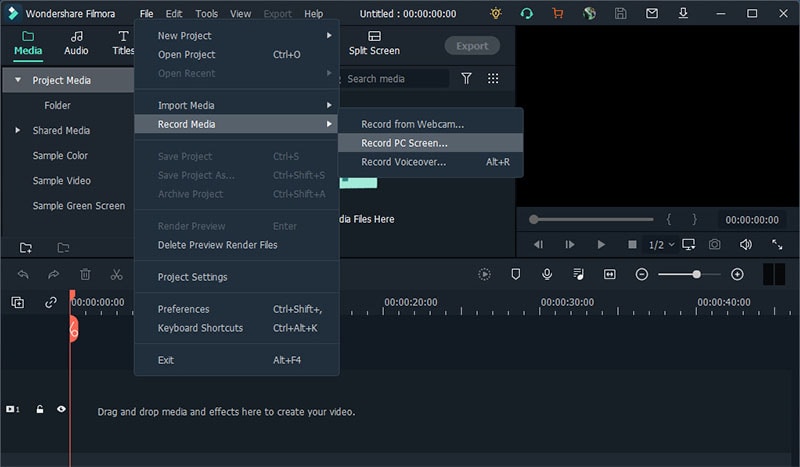
Step 2: Launch Screen Recorder
As you’re inside the Filmora editor, you can choose the New Project from there. You have a lot of alternatives for your webcam recording settings that are easily understandable and allow you for customizing the screen with various other features.
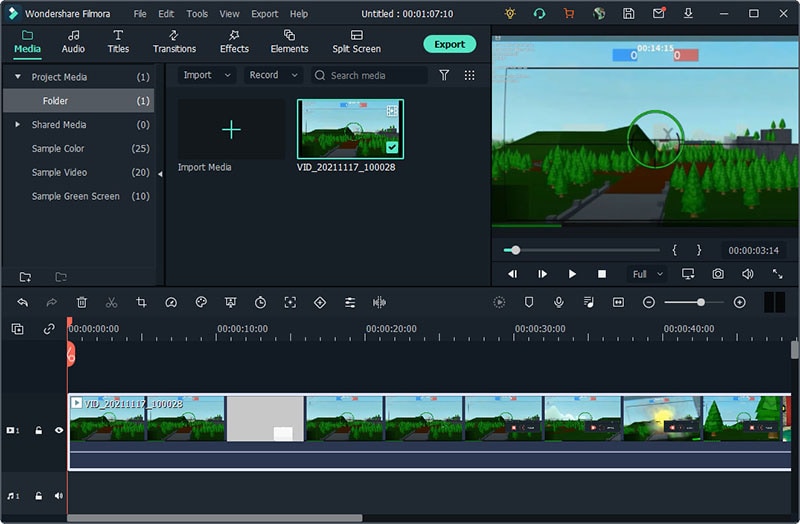
Step 3: Start Recording
As soon as you’re into the recorder interface, just make sure you’ve opened the recording window and then from there, hit the Record button to begin recording right away. At last, when the purpose is fulfilled, hit the Stop button to stop the screen recording and it shall open the file inside the Filmora editor that’s just as easy as it looks like.
Step 4: Share your Recordings
After you’re done with the recording you can likewise edit it with some basic to pro-level alterings including cut/trim or perform other editing features on your screen recording. Afterwards, you can hit the Export button to save your edited masterpiece inside the system and what’s more, you can share your recording from there. Just choose the sharing option and select the platform where you need to broadcast your recorded content or audience.
The Bottom Line
Assuming you love to make content with the gaming or tech checking on recordings then you ought to need a screen recorder with adaptable highlights. In case that is your necessity, you ought to look at AceThinker screen recorders. In case you are not prepared to enlist or join, you can go for Free Online Screen Recorder, yet assuming you are searching for an extreme arrangement where you have all the opportunity to partake in the elements of the screen recorder and even review and alter the recorded record of recordings go to AceThinker Screen Grabber Premium. On the contrary, the Filmora has an easy-to-use interface and offers astounding impacts, text apparatuses, channels alongside fundamental altering highlights that just eases your recording journey has
Part 2. AceThinker Screen Grabber Pro
Part 3. Alternative Way to Record Computer Screen
Part 1. AceThinker Free Online Screen Recorder
AceThinker Free Screen Recorder is an internet-based interactive media screen recorder for Mac, iPad, Windows, and iPhone clients. The application is lightweight, super-quick, and dependable. You can record the screen with an AceThinker Free Screen Recorder while chipping away at constant drawing media for comment. The multifunctional explanation apparatus permits you to add shapes, pictures, and text to the recordings.
Step 1: Go to AceThinker Webpage
Initially, open your program and go to AceThinker free screen recorder and here you will be approached to download the launcher for first-time use. Click on download launcher and whenever it has been downloaded, introduce the launcher and return to the AceThinker site page.
Step 2: Video Settings
Then, at that point, you get to pick the locale of the screen you need to record. You can change the specific settings as indicated by your inclination. Here, you can likewise refresh the sound settings, outline rate, video designs and so forth

Step 3: Initiate/End Recording
When you approve of the settings, click on the red shaded button to start the screen recording. You can likewise stop the video or even erase and afterwards restart the recording assuming you are not fulfilled. Finally, when you are finished with the recording click on the stop button and save the video. You can likewise share this video to your preferred foundation including YouTube, Vimeo, Dropbox and so forth
Part 2. AceThinker Screen Grabber Pro
If, you are somebody in pursuit of a product with further developed elements than any of the free internet-based instruments can offer then you should investigate AceThinker Screen Grabber Premium. AceThinker Screen Grabber Premium has a screen capture catching element and the caught picture can be saved as JPEG, PNG, GIF, and so forth Last yet not least, Screen Grabber upholds different sound and video designs including MP4, AVI, MOV, MP3, M4A, WMA, and some more. This rendition will offer you different choices to satisfy your requests. The spotless interface makes it a successful and easy to use the device for screen recording on your PC permitting you to alter the region you need to catch. On the off chance that you are occupied somewhere else; assist with recording any live video like your talks or any work meeting in progress.
Step 1: Download and Launch the Program
Download the program from the button above and introduce it on your PC. From that point onward, Open the installer and follow the manual to save it on your PC. After the establishment, dispatch it to get to the main interface. You will see the principal interface, as represented underneath.
Step 2: Start Recording
Whenever you have affirmed with the catch area, click OK from the toolbar that will seem to instate recording. A three-second commencement will start, and whenever it’s done, the recording will initiate. Then, at that point, you will see an edge around the catch district with a toolbar underneath it. You can handle the recording progress utilizing the choices in this toolbar.
Step 3: Finish and Save the Recording
At the point when you are finished recording and explaining, click the Stop button to complete the screencast. When the recording closes, the recorded video will show up on the see board of the device. Assuming you need to share the recorded video on YouTube or your FTP, you can get to the transfer choice. By tapping the “Transfer” button You can play the video, transfer a new record, find the record, and the sky is the limit from there. In case you have different recordings recorded, you can orchestrate them in a rundown or rename them as indicated by your necessities.

Part 3. Alternative Way to Record Computer Screen
Notwithstanding, AceThinker Screen Grabber probably won’t meet your necessity as a web-based record maker who utilizes thorough expert level altering. This screen recorder, while being liberated from cost and portable, it accompanies specific constraints. There are customizations you can just do in more remarkable screen recording and altering software. The application doesn’t offer much in cutting edge video altering like chroma key, speed sloping, outlines each subsequent change, and so forth. The issue with video editors is their muddled nature that compels you to go through days learning their intricate details. However, at that point, there are different projects like Filmora Screen Recorder that have their attention set on making it as simple as conceivable to alter your clasps. Accessible for Windows just as Mac machines, it is as easy to use as it highlights rich, and can be messed with regardless of whether you have no earlier thought of how to alter recordings.
The straightforwardness of the entire issue is apparent right from the beginning. You can likewise utilize this instrument on low-end workstations and work areas. It is a lightweight load with a simple to utilize interface. Filmora is a video editorial manager application that offers highlights like managing, changes, overlays, and other amazing impacts. A basic yet hearty application can run on Windows and iOS gadgets. The interface of Filmora Video Editor is a humble and natural one. Four fundamental choices welcome you toward the beginning. The initial one is to begin altering a video, while the subsequent one is for opening a new venture. The third one is the activity camera apparatus, while the fourth one is intended for right away slashing your long recordings. There’s likewise a dropdown menu permitting you to choose the perspective proportion you need your altered video to have.
Step 1: Download and Install Wondershare Filmora
You can visit the official website and get the latest version of the Filmora for free. As soon as the download has been completed, you can install the software in minutes. We recommend going for Default installation if you’re a beginner and lacks pro-level know-how. Filmora sorts out the screen recording task as soon as you launch it on your system.
For Win 7 or later (64-bit)
For macOS 10.12 or later
Step 2: Launch Screen Recorder
As you’re inside the Filmora editor, you can choose the New Project from there. You have a lot of alternatives for your webcam recording settings that are easily understandable and allow you for customizing the screen with various other features.
Step 3: Start Recording
As soon as you’re into the recorder interface, just make sure you’ve opened the recording window and then from there, hit the Record button to begin recording right away. At last, when the purpose is fulfilled, hit the Stop button to stop the screen recording and it shall open the file inside the Filmora editor that’s just as easy as it looks like.

Step 4: Share your Recordings
After you’re done with the recording you can likewise edit it with some basic to pro-level alterings including cut/trim or perform other editing features on your screen recording. Afterwards, you can hit the Export button to save your edited masterpiece inside the system and what’s more, you can share your recording from there. Just choose the sharing option and select the platform where you need to broadcast your recorded content or audience.
The Bottom Line
Assuming you love to make content with the gaming or tech checking on recordings then you ought to need a screen recorder with adaptable highlights. In case that is your necessity, you ought to look at AceThinker screen recorders. In case you are not prepared to enlist or join, you can go for Free Online Screen Recorder, yet assuming you are searching for an extreme arrangement where you have all the opportunity to partake in the elements of the screen recorder and even review and alter the recorded record of recordings go to AceThinker Screen Grabber Premium. On the contrary, the Filmora has an easy-to-use interface and offers astounding impacts, text apparatuses, channels alongside fundamental altering highlights that just eases your recording journey has
Part 2. AceThinker Screen Grabber Pro
Part 3. Alternative Way to Record Computer Screen
Part 1. AceThinker Free Online Screen Recorder
AceThinker Free Screen Recorder is an internet-based interactive media screen recorder for Mac, iPad, Windows, and iPhone clients. The application is lightweight, super-quick, and dependable. You can record the screen with an AceThinker Free Screen Recorder while chipping away at constant drawing media for comment. The multifunctional explanation apparatus permits you to add shapes, pictures, and text to the recordings.
Step 1: Go to AceThinker Webpage
Initially, open your program and go to AceThinker free screen recorder and here you will be approached to download the launcher for first-time use. Click on download launcher and whenever it has been downloaded, introduce the launcher and return to the AceThinker site page.
Step 2: Video Settings
Then, at that point, you get to pick the locale of the screen you need to record. You can change the specific settings as indicated by your inclination. Here, you can likewise refresh the sound settings, outline rate, video designs and so forth
Step 3: Initiate/End Recording
When you approve of the settings, click on the red shaded button to start the screen recording. You can likewise stop the video or even erase and afterwards restart the recording assuming you are not fulfilled. Finally, when you are finished with the recording click on the stop button and save the video. You can likewise share this video to your preferred foundation including YouTube, Vimeo, Dropbox and so forth
Part 2. AceThinker Screen Grabber Pro
If, you are somebody in pursuit of a product with further developed elements than any of the free internet-based instruments can offer then you should investigate AceThinker Screen Grabber Premium. AceThinker Screen Grabber Premium has a screen capture catching element and the caught picture can be saved as JPEG, PNG, GIF, and so forth Last yet not least, Screen Grabber upholds different sound and video designs including MP4, AVI, MOV, MP3, M4A, WMA, and some more. This rendition will offer you different choices to satisfy your requests. The spotless interface makes it a successful and easy to use the device for screen recording on your PC permitting you to alter the region you need to catch. On the off chance that you are occupied somewhere else; assist with recording any live video like your talks or any work meeting in progress.
Step 1: Download and Launch the Program
Download the program from the button above and introduce it on your PC. From that point onward, Open the installer and follow the manual to save it on your PC. After the establishment, dispatch it to get to the main interface. You will see the principal interface, as represented underneath.
Step 2: Start Recording
Whenever you have affirmed with the catch area, click OK from the toolbar that will seem to instate recording. A three-second commencement will start, and whenever it’s done, the recording will initiate. Then, at that point, you will see an edge around the catch district with a toolbar underneath it. You can handle the recording progress utilizing the choices in this toolbar.

Step 3: Finish and Save the Recording
At the point when you are finished recording and explaining, click the Stop button to complete the screencast. When the recording closes, the recorded video will show up on the see board of the device. Assuming you need to share the recorded video on YouTube or your FTP, you can get to the transfer choice. By tapping the “Transfer” button You can play the video, transfer a new record, find the record, and the sky is the limit from there. In case you have different recordings recorded, you can orchestrate them in a rundown or rename them as indicated by your necessities.
Part 3. Alternative Way to Record Computer Screen
Notwithstanding, AceThinker Screen Grabber probably won’t meet your necessity as a web-based record maker who utilizes thorough expert level altering. This screen recorder, while being liberated from cost and portable, it accompanies specific constraints. There are customizations you can just do in more remarkable screen recording and altering software. The application doesn’t offer much in cutting edge video altering like chroma key, speed sloping, outlines each subsequent change, and so forth. The issue with video editors is their muddled nature that compels you to go through days learning their intricate details. However, at that point, there are different projects like Filmora Screen Recorder that have their attention set on making it as simple as conceivable to alter your clasps. Accessible for Windows just as Mac machines, it is as easy to use as it highlights rich, and can be messed with regardless of whether you have no earlier thought of how to alter recordings.
The straightforwardness of the entire issue is apparent right from the beginning. You can likewise utilize this instrument on low-end workstations and work areas. It is a lightweight load with a simple to utilize interface. Filmora is a video editorial manager application that offers highlights like managing, changes, overlays, and other amazing impacts. A basic yet hearty application can run on Windows and iOS gadgets. The interface of Filmora Video Editor is a humble and natural one. Four fundamental choices welcome you toward the beginning. The initial one is to begin altering a video, while the subsequent one is for opening a new venture. The third one is the activity camera apparatus, while the fourth one is intended for right away slashing your long recordings. There’s likewise a dropdown menu permitting you to choose the perspective proportion you need your altered video to have.
Step 1: Download and Install Wondershare Filmora
You can visit the official website and get the latest version of the Filmora for free. As soon as the download has been completed, you can install the software in minutes. We recommend going for Default installation if you’re a beginner and lacks pro-level know-how. Filmora sorts out the screen recording task as soon as you launch it on your system.
For Win 7 or later (64-bit)
For macOS 10.12 or later
Step 2: Launch Screen Recorder
As you’re inside the Filmora editor, you can choose the New Project from there. You have a lot of alternatives for your webcam recording settings that are easily understandable and allow you for customizing the screen with various other features.
Step 3: Start Recording
As soon as you’re into the recorder interface, just make sure you’ve opened the recording window and then from there, hit the Record button to begin recording right away. At last, when the purpose is fulfilled, hit the Stop button to stop the screen recording and it shall open the file inside the Filmora editor that’s just as easy as it looks like.
Step 4: Share your Recordings
After you’re done with the recording you can likewise edit it with some basic to pro-level alterings including cut/trim or perform other editing features on your screen recording. Afterwards, you can hit the Export button to save your edited masterpiece inside the system and what’s more, you can share your recording from there. Just choose the sharing option and select the platform where you need to broadcast your recorded content or audience.
The Bottom Line
Assuming you love to make content with the gaming or tech checking on recordings then you ought to need a screen recorder with adaptable highlights. In case that is your necessity, you ought to look at AceThinker screen recorders. In case you are not prepared to enlist or join, you can go for Free Online Screen Recorder, yet assuming you are searching for an extreme arrangement where you have all the opportunity to partake in the elements of the screen recorder and even review and alter the recorded record of recordings go to AceThinker Screen Grabber Premium. On the contrary, the Filmora has an easy-to-use interface and offers astounding impacts, text apparatuses, channels alongside fundamental altering highlights that just eases your recording journey has
Part 2. AceThinker Screen Grabber Pro
Part 3. Alternative Way to Record Computer Screen
Part 1. AceThinker Free Online Screen Recorder
AceThinker Free Screen Recorder is an internet-based interactive media screen recorder for Mac, iPad, Windows, and iPhone clients. The application is lightweight, super-quick, and dependable. You can record the screen with an AceThinker Free Screen Recorder while chipping away at constant drawing media for comment. The multifunctional explanation apparatus permits you to add shapes, pictures, and text to the recordings.
Step 1: Go to AceThinker Webpage
Initially, open your program and go to AceThinker free screen recorder and here you will be approached to download the launcher for first-time use. Click on download launcher and whenever it has been downloaded, introduce the launcher and return to the AceThinker site page.
Step 2: Video Settings
Then, at that point, you get to pick the locale of the screen you need to record. You can change the specific settings as indicated by your inclination. Here, you can likewise refresh the sound settings, outline rate, video designs and so forth
Step 3: Initiate/End Recording
When you approve of the settings, click on the red shaded button to start the screen recording. You can likewise stop the video or even erase and afterwards restart the recording assuming you are not fulfilled. Finally, when you are finished with the recording click on the stop button and save the video. You can likewise share this video to your preferred foundation including YouTube, Vimeo, Dropbox and so forth
Part 2. AceThinker Screen Grabber Pro
If, you are somebody in pursuit of a product with further developed elements than any of the free internet-based instruments can offer then you should investigate AceThinker Screen Grabber Premium. AceThinker Screen Grabber Premium has a screen capture catching element and the caught picture can be saved as JPEG, PNG, GIF, and so forth Last yet not least, Screen Grabber upholds different sound and video designs including MP4, AVI, MOV, MP3, M4A, WMA, and some more. This rendition will offer you different choices to satisfy your requests. The spotless interface makes it a successful and easy to use the device for screen recording on your PC permitting you to alter the region you need to catch. On the off chance that you are occupied somewhere else; assist with recording any live video like your talks or any work meeting in progress.
Step 1: Download and Launch the Program
Download the program from the button above and introduce it on your PC. From that point onward, Open the installer and follow the manual to save it on your PC. After the establishment, dispatch it to get to the main interface. You will see the principal interface, as represented underneath.
Step 2: Start Recording
Whenever you have affirmed with the catch area, click OK from the toolbar that will seem to instate recording. A three-second commencement will start, and whenever it’s done, the recording will initiate. Then, at that point, you will see an edge around the catch district with a toolbar underneath it. You can handle the recording progress utilizing the choices in this toolbar.
Step 3: Finish and Save the Recording
At the point when you are finished recording and explaining, click the Stop button to complete the screencast. When the recording closes, the recorded video will show up on the see board of the device. Assuming you need to share the recorded video on YouTube or your FTP, you can get to the transfer choice. By tapping the “Transfer” button You can play the video, transfer a new record, find the record, and the sky is the limit from there. In case you have different recordings recorded, you can orchestrate them in a rundown or rename them as indicated by your necessities.
Part 3. Alternative Way to Record Computer Screen
Notwithstanding, AceThinker Screen Grabber probably won’t meet your necessity as a web-based record maker who utilizes thorough expert level altering. This screen recorder, while being liberated from cost and portable, it accompanies specific constraints. There are customizations you can just do in more remarkable screen recording and altering software. The application doesn’t offer much in cutting edge video altering like chroma key, speed sloping, outlines each subsequent change, and so forth. The issue with video editors is their muddled nature that compels you to go through days learning their intricate details. However, at that point, there are different projects like Filmora Screen Recorder that have their attention set on making it as simple as conceivable to alter your clasps. Accessible for Windows just as Mac machines, it is as easy to use as it highlights rich, and can be messed with regardless of whether you have no earlier thought of how to alter recordings.
The straightforwardness of the entire issue is apparent right from the beginning. You can likewise utilize this instrument on low-end workstations and work areas. It is a lightweight load with a simple to utilize interface. Filmora is a video editorial manager application that offers highlights like managing, changes, overlays, and other amazing impacts. A basic yet hearty application can run on Windows and iOS gadgets. The interface of Filmora Video Editor is a humble and natural one. Four fundamental choices welcome you toward the beginning. The initial one is to begin altering a video, while the subsequent one is for opening a new venture. The third one is the activity camera apparatus, while the fourth one is intended for right away slashing your long recordings. There’s likewise a dropdown menu permitting you to choose the perspective proportion you need your altered video to have.
Step 1: Download and Install Wondershare Filmora
You can visit the official website and get the latest version of the Filmora for free. As soon as the download has been completed, you can install the software in minutes. We recommend going for Default installation if you’re a beginner and lacks pro-level know-how. Filmora sorts out the screen recording task as soon as you launch it on your system.
For Win 7 or later (64-bit)
For macOS 10.12 or later
Step 2: Launch Screen Recorder
As you’re inside the Filmora editor, you can choose the New Project from there. You have a lot of alternatives for your webcam recording settings that are easily understandable and allow you for customizing the screen with various other features.
Step 3: Start Recording
As soon as you’re into the recorder interface, just make sure you’ve opened the recording window and then from there, hit the Record button to begin recording right away. At last, when the purpose is fulfilled, hit the Stop button to stop the screen recording and it shall open the file inside the Filmora editor that’s just as easy as it looks like.
Step 4: Share your Recordings
After you’re done with the recording you can likewise edit it with some basic to pro-level alterings including cut/trim or perform other editing features on your screen recording. Afterwards, you can hit the Export button to save your edited masterpiece inside the system and what’s more, you can share your recording from there. Just choose the sharing option and select the platform where you need to broadcast your recorded content or audience.
The Bottom Line
Assuming you love to make content with the gaming or tech checking on recordings then you ought to need a screen recorder with adaptable highlights. In case that is your necessity, you ought to look at AceThinker screen recorders. In case you are not prepared to enlist or join, you can go for Free Online Screen Recorder, yet assuming you are searching for an extreme arrangement where you have all the opportunity to partake in the elements of the screen recorder and even review and alter the recorded record of recordings go to AceThinker Screen Grabber Premium. On the contrary, the Filmora has an easy-to-use interface and offers astounding impacts, text apparatuses, channels alongside fundamental altering highlights that just eases your recording journey has
- Title: 2024 Approved AceThinker Screen Recorder Review and Alternative
- Author: Amelia
- Created at : 2024-07-18 19:39:29
- Updated at : 2024-07-19 19:39:29
- Link: https://screen-capture.techidaily.com/2024-approved-acethinker-screen-recorder-review-and-alternative/
- License: This work is licensed under CC BY-NC-SA 4.0.